 |
| Supplies |
This is a divergence from painted miniatures; but a symptom of why I haven't much hobby time these days. With two young kids, our living room is a catastrophe of toys so I wanted to replace our existing coffee table with something that was more storage friendly and matched a dog crate I'd made a couple of years back. Anyway, I started with dimensional lumber (the cheap stuff from a big box store).
I don't have much in the way of proper woodworking tools, so everything is cut with a circular saw. But what I do have is a Kreg Jig. Which allows for pocket holes (you'll see an example later). I highly recommend one of these. They let you easily make screw holes that are 'hidden' and don't split the wood.
Since everything is cut with a circular saw, clamping the legs or any other pieces together that should be the same length, let me cut them together, and also sand them together so they stay relatively even.
 |
| Accurate cuts? |
You can see some cuts running lengthwise on a few of these boards. Those come in later for attaching the table tops. Later, I clamp everything together and use Krege screws in the pocket holes (and glue) to get a good joint.


Once I had assembled the whole frame of the table, I used these z shaped clamps from a woodworking shop to attach the table top. I cut the grooves out with my circular saw. Many DIY sites out there with plans for anything (tables especially though) just advise to screw everything together. This is wrong! Wood expands and contracts with the humidity throughout the year and the cheap dimensional stuff that has been sitting outside at a big box store is especially prone. You can dry it out for a while (apparently) but you still want to allow for the boards to move. Boards primarily shrink along the width/thickness of the board. This is usually not noticable but when dealing with larger surfaces like a table top which can be 2 to 4 feet across, the effect is exacerbated. So with these little clips, it allows the wood to move seasonally without splitting the lumber. There are far better sources of info out there, but I thought it prudent to at least flag this issue because it never seems to be discussed on the simple DIY sites, and then your pretty project cracks a month later.
 |
| more clips |
 |
| Table without the bottom shelf |
The photo above doesn't have the bottom table top added yet, nor the cross beams. You can see on the bottom though that a 'ledge' has been cut into the long boards so that the bottom table top has something to float on.
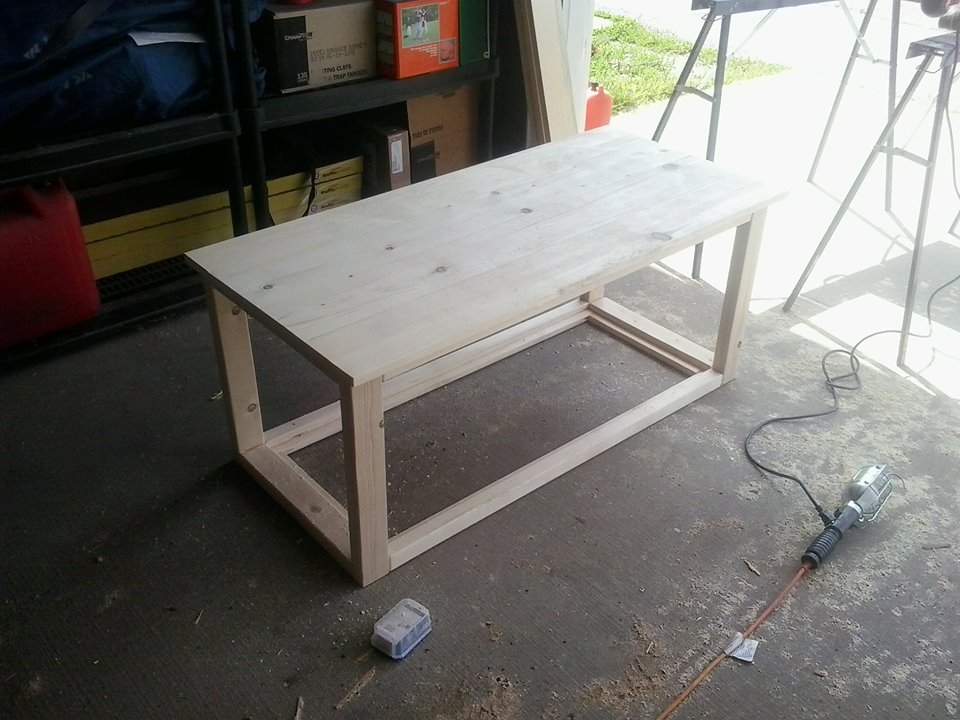
The photo below is the final dry fit. I still have to cut the boards for the bottom the way I want but this gives the overall design of the table. I made it a little higher than our old one (and maybe higher than normal tables? but the intent is to store toys in IKEA bins beneath it so it had to be high enough to fit. The cross beams are 'aesthetic' but also act as a book end so kids books can be stacked under there as well.
 |
| Dry fit table surfaces |
Once that's done, it's more staining and varnish before it moves into the house.


Comments
Post a Comment